HDF5_BLS Library: Comprehensive Researcher Tutorial
This tutorial describes how to use the Wrapper object to manage Brillouin Light Scattering (BLS) data. The library enforces basic HDF5 organization to ensure data integrity across research teams.
Methods Index
Method |
Purpose |
|---|---|
Initialize a connection to an HDF5 file. |
|
Save and close the HDF5 file. |
|
Create a new group in the file hierarchy. |
|
Rename a group or dataset. |
|
Change the organizational type of an element. |
|
Remove an element (group or dataset) from the file. |
|
Add raw spectrometer data. |
|
Add Power Spectral Density data. |
|
Add a frequency axis array. |
|
Add results from data treatment (shift, linewidth, etc.). |
|
Add independent variables (axes) for the data. |
|
Add metadata attributes to any file element. |
|
Robustly add multiple datasets and attributes at once. |
|
Merge another HDF5 file into the current one. |
|
Merge two Wrapper objects into a new one. |
|
Combine multiple datasets into a higher-dimensional array. |
|
Print the visual tree of the file hierarchy. |
|
Retrieve the file structure as a Python dictionary. |
|
Print metadata associated with a specific path. |
|
Retrieve metadata as a Python dictionary. |
|
Access datasets directly using path notation (e.g., |
|
Export a dataset to CSV, Excel, or Numpy formats. |
1. Initialization: Starting a Session
The Wrapper object is your gateway to an HDF5 file.
Methods: __init__
To create a new file, you have two options:
Provide a path to a permanent file -> the file is created at the path you provide, e.g.
from wrapper import Wrapper
import numpy as np

# Create a permanent file
wrp = Wrapper("path/to/your/file.h5")
Do not provide a path to create a temporary file -> a file is created in the OS temp folder
from wrapper import Wrapper
import numpy as np

# Create a temporary file
wrp_temp = Wrapper()
You can also provide the path of an existing HDF5 file to open:
from wrapper import Wrapper
import numpy as np

# Open an existing file
wrp = Wrapper("path/to/your/file.h5")
Outcome:
If the file is new (either permanent or temporary), a root group named
Brillouinis automatically created with the attributeBrillouin_type: Root, resulting in the following base file structure:
file.h5
    └── Brillouin (group, Brillouin_type: Root)
Methods: close
To close your file, use wrp.close(). This will save the file and close the connection to the HDF5 file.
Warning
If you are using a temporary file and have not moved it to a permanent location, the library will raise a WrapperError_Save to prevent accidental data loss.
You can of course discard a temp file, using wrp.close(delete_temp_file=True).
2. Organizing the Hierarchy
Methods: create_group, change_name, change_brillouin_type, delete_element
Researchers often need to create nested structures for different samples or processing steps. HDF5 files allow us to create tree-like hierarchies to organize our data using groups. Here is a typical example of the process to create a complex file hierarchy:
Open a new file
wrp = Wrapper('path/to/your/file.h5')
Create one or multiple groups to store your data in with the path of the parent group and the name of the new group. Note that you can also provide the type of the group using the
brillouin_typeparameter. If not provided, the group will be created as aRoottype:
wrp.create_group(name="Treated cells", parent_group="Brillouin", brillouin_type="Measure")
wrp.create_group(name="Untreated cells", parent_group="Brillouin", brillouin_type="Measure")
At this step, you have the following file structure:
file.h5
    └── Brillouin (group, Brillouin_type: Root)
        ├── Treated cells (group, Brillouin_type: Measure)
        └── Untreated cells (group, Brillouin_type: Measure)
You can modify the type of a group using change_brillouin_type with the path of the element and the new type:
wrp.change_brillouin_type(path="Brillouin/Treated cells", brillouin_type="Treatment")
You can also rename a group using change_name with the path of the element and the new name:
wrp.change_name(path="Brillouin/Treated cells", name="Annealed cells")
At this step, you have the following file structure:
file.h5
    └── Brillouin (group, Brillouin_type: Root)
        ├── Annealed cells (group, Brillouin_type: Treatment)
        └── Untreated cells (group, Brillouin_type: Measure)
You can also delete a group (or any element) using delete_element and the path of the element:
wrp.delete_element("Brillouin/Annealed cells")
At this step, you have the following file structure:
file.h5
    └── Brillouin (group, Brillouin_type: Root)
        └── Untreated cells (group, Brillouin_type: Measure)
Note
Deletion: When you use wrp.delete_element("path/to/data"), the data is removed, but HDF5 files do not shrink in size immediately. The library sets a need_for_repack flag. The file size will only shrink (repack) once wrp.close() is called.
3. Adding Data and Metadata
The library provides several methods to add data and metadata to your HDF5 file. While all data addition is centrally managed by the add_dictionary method—which is safe but can be complex and less user-friendly—the library offers derived, type-specific methods that the user is invited to use for a smoother experience.
To add a single dataset to a group, you first need to identify the type of dataset you want to add:
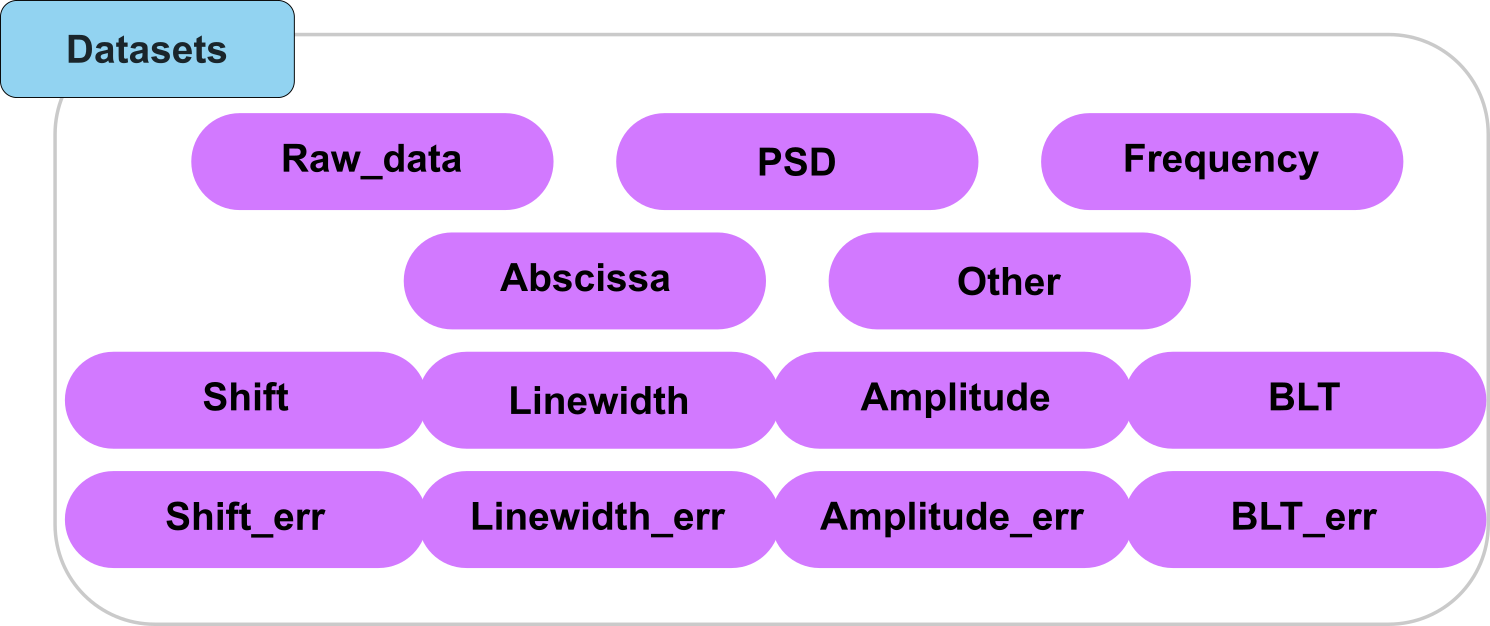
Fig. 9 A visual representation of the types of datasets that can be added to the HDF5 file.
Common Derived Methods
The following methods provide the easiest way to add specific data types:
add_raw_data: For unprocessed spectrometer signals.
add_PSD: For Power Spectral Density arrays.
add_frequency: For the frequency axis associated with a PSD.
add_abscissa: For spatial or temporal axes.
add_treated_data: For batch-adding shift, linewidth, and their errors.
Note that for all these methods, you will need to specify amongst other parameters, the group where to save the array (argument ‘parent_group’). Here you can either specify an existing group, or create a new one by specifying a path to a non-existing group
Using Derived Methods for raw data, PSD and frequency arrays
Methods: add_raw_data, add_PSD, add_frequency
To add either raw data, a PSD array or a frequency array, the logic is to specify:
the array to add (argument “data”)
the position in the file (argument “parent_group”)
the name of the dataset (argument “name”)
wether to overwrite the array if an array with same name exists in the group (optional argument “overwrite”)
import numpy as np

# 1. Add raw experimental data
raw_data = np.random.random((1024,))
wrp.add_raw_data(data=raw_data, parent_group="Brillouin/Untreated cells", name="Raw_Spectrum")

# 2. Add processed PSD and Frequency
psd_data = np.random.random((1024,))
freq_axis = np.linspace(-10, 10, 1024)

wrp.add_PSD(data=psd_data, parent_group="Brillouin/Untreated cells", name="PSD")
wrp.add_frequency(data=freq_axis, parent_group="Brillouin/Untreated cells", name="Frequency")
Using Derived Methods for treated data
Methods: add_treated_data
For treated data, the logic is almost the same: you specify the data to add, the position in the file, and wether to overwrite it or not. However, because BLS usually returns multiple result arrays (shift, linewidth, amplitude, …) it’s less time consuming to save them all in one go, and in a dedicated folder. To do so, you can use the “add_treated_data” method specifying the general attributes:
the parent group (argument “parent_group”)
the name of the group where all the treated data will be stored (argument “name_group”)
wether to overwrite the group if it already exists (optional argument “overwrite”)
and the datasets to add:
the array storing shift values (argument “shift”)
the array storing linewidth values (argument “linewidth”)
the array storing amplitude values (argument “amplitude”)
the array storing loss tangent values (argument “blt”)
the array storing shift errors (argument “shift_err”)
the array storing linewidth errors (argument “linewidth_err”)
the array storing amplitude errors (argument “amplitude_err”)
the array storing loss tangent errors (argument “blt_std”)
Alternatively, you can just specify a HDF5_BLS_treat.Treat object (argument “treat”) which will automatically add all the attributes of the treatment object to the group. This is the recommended way to add treated data as it not only saves all the datasets above but also all the steps followed during the treatment and ensures a unified treatment between members of the community (see The HDF5_BLS_treat package for more information on the treatment object).
# Example of adding treated data with individual arrays
wrp.add_treated_data(parent_group="Brillouin/Untreated cells", name_group="Treated data", shift=shift_data, linewidth=linewidth_data, amplitude=amplitude_data, blt=blt_data, shift_err=shift_err_data, linewidth_err=linewidth_err_data, amplitude_err=amplitude_err_data, blt_std=blt_std_data, treat=treatment_object)

# Example of adding treated data with a Treat object
wrp.add_treated_data(parent_group="Brillouin/Untreated cells", name_group="Treated data", treat=treatment_object)
Assuming you have the Treat object is storing all the datasets used in the first line, you get the exact same result:
file.h5
    └── Brillouin (group, Brillouin_type: Root)
        ├── Annealed cells (group, Brillouin_type: Root)
        └── Untreated cells (group, Brillouin_type: Measure)
            └── Treated data (group, Brillouin_type: Treatment)
                ├── Shift (dataset, Brillouin_type: Shift)
                ├── Linewidth (dataset, Brillouin_type: Linewidth)
                ├── Amplitude (dataset, Brillouin_type: Amplitude)
                ├── BLT (dataset, Brillouin_type: BLT)
                ├── Shift_err (dataset, Brillouin_type: Shift_err)
                ├── Linewidth_err (dataset, Brillouin_type: Linewidth_err)
                ├── Amplitude_err (dataset, Brillouin_type: Amplitude_err)
                └── BLT_std (dataset, Brillouin_type: BLT_err)
Using Derived Methods for abscissa arrays
Methods: add_abscissa
When storing abscissa you generally want to know a few things:
the array itself
the units
to which axis(es) it corresponds
and also, as for all the other arrays,
the name of the dataset
the group where to save it
wether to overwrite it if it already exists
Therefore, in the add_abscissa method, you will have to specify:
the array to add (argument “data”)
the position in the file (argument “parent_group”)
the name of the dataset (argument “name”)
wether to overwrite the array if an array with same name exists in the group (optional argument “overwrite”)
the units of the array (argument “unit”)
the axes the array corresponds to (optional arguments “dim_start” -by default 0- and “dim_end” -by default the dimension of the abscissa array-)
wrp.add_abscissa(data=x_axis, parent_group="Brillouin/Untreated cells", name="X", units="µm", dim_start=0, dim_end=1)
wrp.add_abscissa(data=y_axis, parent_group="Brillouin/Untreated cells", name="Y", units="µm", dim_start=1, dim_end=2)
Note
The ‘Brillouin_type’ of an Abscissa array stores the dimensions to which it applies to a PSD array. In the given example, the Brillouin_type of X will be “Abscissa_0_1” and the Brillouin_type of Y will be “Abscissa_1_2”.
This gives you the following structure:
file.h5
    └── Brillouin (group, Brillouin_type: Root)
        ├── Annealed cells (group, Brillouin_type: Root)
        └── Untreated cells (group, Brillouin_type: Measure)
            ├── X (dataset, Brillouin_type: Abscissa_0_1)
            ├── Y (dataset, Brillouin_type: Abscissa_1_2)
            └── Treated data (group, Brillouin_type: Treatment)
                ├── Shift (dataset, Brillouin_type: Shift)
                ├── Linewidth (dataset, Brillouin_type: Linewidth)
                ├── Amplitude (dataset, Brillouin_type: Amplitude)
                ├── BLT (dataset, Brillouin_type: BLT)
                ├── Shift_err (dataset, Brillouin_type: Shift_err)
                ├── Linewidth_err (dataset, Brillouin_type: Linewidth_err)
                ├── Amplitude_err (dataset, Brillouin_type: Amplitude_err)
                └── BLT_std (dataset, Brillouin_type: BLT_err)
Adding Metadata (Attributes)
Methods: add_attribute
Metadata are paramount to contextualize your measurements. You can add attributes to any group or dataset. These attributes present themeselves as a dictionary of key-value pairs:
attributes = {"SPECTROMETER.Type": "VIPA",
              "MEASURE.Sample": "HUVEC"}

# Add laser wavelength to the measurement group
wrp.add_attribute(attributes=attributes, parent_group="Brillouin/Untreated cells")
Important
A list of normalized names for attributes can be found in the data/spreadsheets/ folder of the project directory. Alternatively, the HDF5_BLS.NormalizedAttributes class can be used to find the normalized names for attributes as well as normalized values for e.g. polarization (the spreadsheet is exported from the HDF5_BLS.NormalizedAttributes class).
The Underlying Method behind all the derived methods for adding things to the file: add_dictionary
Method: add_dictionary
While more complex, add_dictionary allows you to add one or multiple datasets and all their attributes in a single call. It is used internally by the derived methods to ensure consistent file structure. The interest of this logic is that add_dictionary has been hard stressed and tested, so it is very likely to work as expected and generate a correct file structure, and therefore any addition of datasets in your files are very unlikely to fail, break your file or generate a bug whatsoever.
data_packet = {
    "PSD": {"Name": "Map_Data", "Data": np.random.random((5, 5, 1024))},
    "Attributes": {"Integration_Time": "10s", "Laser_Power": "20mW"}
}
wrp.add_dictionary(data_packet, parent_group="Brillouin/Untreated cells")
4. Merging files
You might want to merge files, for example obtained from different measures or series of measures. There are two main ways to do this that depend on the result you want to obtain:
You want to create a “macro” file containing the contents of file 1 and file 2 at the same (top-most) level
file.h5
    └── Brillouin (group, Brillouin_type: Root)
        └── Contents of file 1 (group, Brillouin_type: Root)
        └── Contents of file 2 (group, Brillouin_type: Root)
In this case, you will simply create two instances of Wrapper for each file and use the __add__ method to obtain the desired file:
wrp1 = Wrapper('path/to/file1.h5')
wrp2 = Wrapper('path/to/file2.h5')

wrp3 = wrp1 + wrp2 # Note: This is the lexical expression associated to the "__add__" dunder method.
Important
Don’t forget to save wrp3 as it has been created as a temporary file.
You want to store File 2 in a dedicated group of File 1
File1.h5
    └── Brillouin (group, Brillouin_type: Root)
        └── Group 1 of file 1 (group, Brillouin_type: Root)
        └── Group 2 of file 1 (group, Brillouin_type: Root)
        └── ...
        └── Contents of file 2 (group, Brillouin_type: Root)
To achieve this result, you can use the add_hdf5 method, specifyng the file to add and the group where to save it.
# Import 'experiment_day2.h5' into our current file
wrp.add_hdf5("experiment_day2.h5", parent_group="Brillouin/Contents of file 2")
Combining Datasets (combine_datasets)
One interesting feature of the Wrapper class is the ability to combine datasets into higher dimensionality arrays. This can be useful for example when you have mappings stored as point-by-point data instead of as a single array, or when you want to compress the data in some way for improved readability (it doesn’t affect much the size of the file).
# Combine two 1D spectra into a single 2D dataset
wrp.combine_datasets(datasets=["Brillouin/S1/Spec1", "Brillouin/S1/Spec2"],
                     parent_group="Brillouin/Combined",
                     name="Total_Spectra")
Outcome:
If Spec1 and Spec2 were arrays of shape (1024,), the new dataset Total_Spectra will have a shape of (2, 1024).
5. Inspection and Visualization
Methods: print_structure, print_metadata, get_structure, get_attributes
We have developped a few methods to help you inspect the contents of your file easily in the terminal. For instance you can print the structure of the file in a tree format with the print_structure method:
# Visual tree print
wrp.print_structure()
The get_structure is very similar although it is not meant for visualization. It returns the structure of the file as a nested dictionary.
structure = wrp.get_structure()
You can also print the metadata of a specific group or dataset with the print_metadata method. This will extract all the metadata applied to the group or dataset and print it in a human-readable format. Note that metadata are applied hierarchically: metadata of parent groups are inherited by child groups and datasets unless they are overwritten by the child group or dataset metadata.
# Print metadata of a specific group
wrp.print_metadata("Brillouin/Annealed_Sample_A")
Likewise, the get_attributes method allows you to get the metadata of a specific group or dataset as a dictionary.
attributes = wrp.get_attributes("Brillouin/Annealed_Sample_A")
6. Accessing Data
Methods: __getitem__
To access datasets, the most straightforward method is to use the __getitem__ dunder method, which allows you to access datasets using the [] operator.
# Accessing data directly
my_array = wrp["Brillouin/Annealed_Sample_A/Map_Data"]
7. Export
Methods: export_dataset
Although HDF5 files are widely compatible with most programming languages, you might want to export your data to a different format for analysis in other software, or for your own convenience. The export_dataset method allows you to export a specific dataset to a .csv, .xlsx, or .npy file. To do so, you just need to provide the path to the dataset you want to export, the name of the file you want to create, and the export type.
Important
The export_dataset method will only work for 1D and 2D datasets. If you try to export a 3D dataset, it will raise a WrapperError_ArgumentType.
wrp.export_dataset("Brillouin/Annealed_Sample_A/Map_Data", "output.csv", export_type=".csv")
8. Error Handling Reference
WrapperError: This is the general error of the Wrapper object. It is raised whenever something unexpected has happened that has not yet been clearly classified further.
WrapperError_FileNotFound: This error is raised when a file path provided to a method does not exist.
WrapperError_StructureError: This error is raised when the structure of the file is not as expected. For example, if you try to extract a dataset with a path that does not exist.
WrapperError_Overwrite: This error is raised when you try to create a group or dataset with a path that already exists.
WrapperError_ArgumentType: This error is raised when an argument provided to a method is of the wrong type or somehow unexpected.
WrapperError_Save: This error is raised when the HDF5 file associated to the wrapper is saved at a temporary location.